
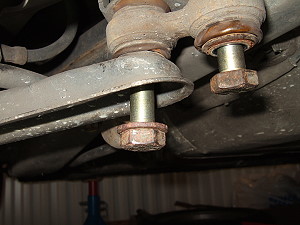
RemovingThe dogbones are located just in front of the rear trailing arms. It is not necessary but helps a bit if the car rests on the rear wheels when removing the dogbones. This can be achieved by using car ramps or a lift. If not, simply jack up the car and place two jack stands under it. You should NEVER work under a car without supporting jack stands! 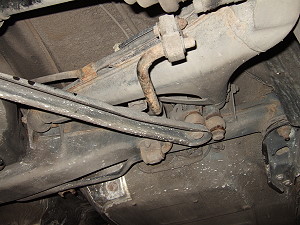 Picture 3 : The dogbones are located just in front of the rear trailing arms. 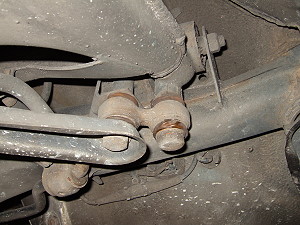 Picture 4 : A closer look at the dogbones. It is strongly recommended to use an impact wrench to remove these bolts. If you don’t have access to an impact wrench then I suggest you find the best 22 mm socket you can find (I’m talking about 6-point with Round-Corner, Optipunkt, or similar technique) and the sturdiest and longest breaker bar you can find. You will then need to extend that breaker bar with half a meter of pipe or so. 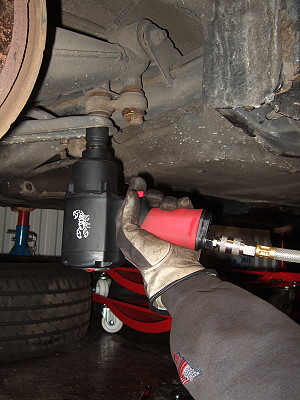 Picture 5 : Strongly recommended to use an impact wrench to remove the bolts. 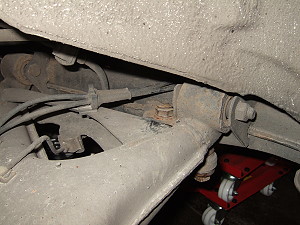 Picture 6 : One of the bolts (the one connected to the subframe and not the rear trailing arm) is secured with a nut on the other side. 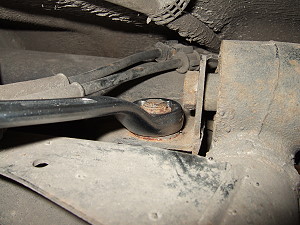 Picture 7 : Use a 22 mm box-end wrench to keep the nut still while you undo the bolt. Note the usage and location of the flat washers used. What I describe here is the usage as it was when I removed the dogbones on my car (probably original from the factory and never replaced) – because the usage differs slightly from what ETK states. It is also slightly different between the right and left side due to the metal rod appearing on the right side but not on the left side. | Left side
 Picture 8 : Removing the old dogbone (note the usage of flat washers). 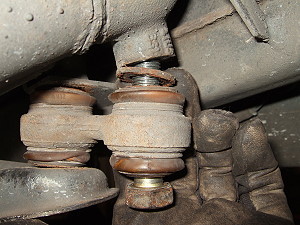 Picture 9 : Removing the old dogbone (note the usage of flat washers). 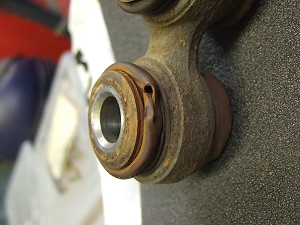 Picture 10 : One of the old dogbones. Clearly damaged and was in need of replacement. InstallingWhen it’s time to install the new dogbones it is recommended to have the car resting on all four wheels. Either you do it by car ramps, lift, or any other solution – it helps really a lot! Otherwise, the rear trailing arm will point downwards and you have to try to install the dogbones in a twisted position (very obvious if you take a look at Picture 9). If none of the above are available you can always jack up the wheel with a floor jack as seen in Picture 12. But be careful with this method as the car will most probably lift off from the jack stand! I used the method with small car ramps and that worked fine! This method made it also easy to torque the bolts down as this MUST be done with the car standing in normal load position! 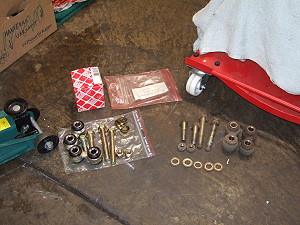 Picture 11 : All the new good stuff to the left and the bad old stuff to the right. 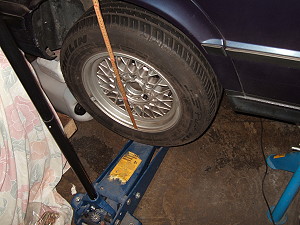 Picture 12 : One way to raise the trailing arm to ease the installation of the dogbones. Also works to jack up the wheel in normal load position which must be done before tightening the bolts. But the recommended method is to use small car ramps instead. The installation of the dogbones is very straightforward. Start for example with the short M14x60 bolt and fasten it with a couple of turns. Then take the long M14x100 bolt and push it all the way through. You might need to give a light knock with a small hammer or so. Then install the nut with a couple of turns. As it is a metal self-locking nut you can only do the first turns by hand and the rest you need tools for it. It’s a little bit tight but just take your time – don’t forget the washers! 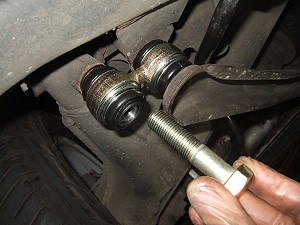 Picture 13 : The short M14x60 bolt is a good start.  Picture 14 : Then the long M14x100 bolt with a nut on the other side. 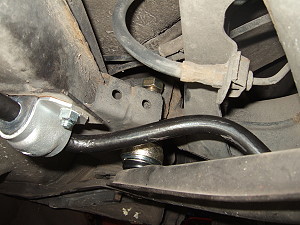 Picture 15 : The location of the nut above the dogbone. Now fasten the short M14x60 bolt completely. Then use a 22 mm box-end wrench as a counterhold on the nut and fasten the long M14x100 bolt. Now tighten the bolts down to correct torque, see the end of the article. Make sure the car, especially the rear wheels, are in normal load position. Otherwise, you will torque the bushings in the incorrect position and they will wear out faster than normally. 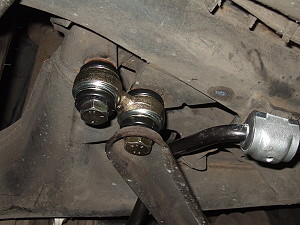 Picture 16 : Right dogbone installed! Now do the same thing for the left side. Tightening Torques
|